
viewarticle.jsp?id=5552310
PENDING CHINA TARIFFS HAVING A CHILLING EFFECT ON SPOT PE PRICES ON RESINS FOR PLASTIC Molding Manufacturers and Companies
WHO’S AFFECTED?
FIRST, LET’S REVIEW THE Plastic Molding Processes

Plastic processes differ greatly in both the way they form plastic products and in the shape and structural integrity of the products they manufacture. Plastic molding processes vary greatly in cost. High end plastic molding processes, such as rotational molding and injection molding, provide precision three dimensional plastic parts with structural integrity and impact resistance few other processes or materials can provide. On the other end of the spectrum, blow molding and dip molding processes offer very affordable options for long runs and mass production of containers and household commodity items. A wide range of plastic materials are molded through these processes, although some processes are more effective with certain polymers than others.

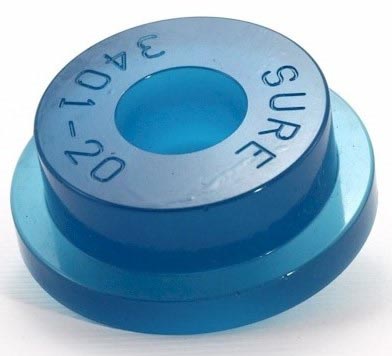
This is one of the most common forms of plastic molding, and the process can range widely in cost, depending on the complexity of the part being molded and the materials which are used. Injection molding produces three dimensional, solid parts with mid to high strength and is unique in plastic molding processes, as it can produce relatively complex shapes. Advanced injection molding techniques include insert molding and reaction injection molding (RIM); insert molding dies contain a solid object, such as an electric coil, around which the molten plastic is injected, creating an encapsulated object. Reaction injection molding combines a liquid resin thermoset polymer (typically polyurethane) with liquid polyisocyanate, which acts as a reagent within the mold, causing the polymers to expand and form bubbles (either open or closed cell foam), filling the mold.

Plastic extrusions are formed similarly to the way injection molded plastics are formed, although extrusions are formed through an open die. Plastic resins such as PVC, acrylic, polypropylene or ABS are fed through a hopper into the extruding barrel, which shears and melts the resin, pushing it through the open die to form a profile or shape. This profile is immediately immersed in cold water to set the plastic; the profile is extruded continuously, passing through the die, through cold water tanks and onto a sawing table, where pre-specified lengths are cut. Most common products are plastic tubing and plastic tanks.

Numerous products are made from blow molding. Any consumer item that has a three-dimensional shape and is hollow, such as and plastic tanks and CD and carrying cases, is manufactured using the blow molding process. Blow molded products are capable of holding a variety of substances such as herbicides, pesticides, cosmetics, and automotive oil. The plastic utilized for these processes are all thermoplastic resins. They include acetal, polysulfone, polyamide, polystyrene, butadiene styrene, Barex, polyvinyl chrloride (PVC), and high and low density polycarbonate.

Dip molding plastic is one of the simplest means of molding plastic and, like blow molding, is capable of producing a large number of parts or products at low cost. The dip molding process serves in one of two manufacturing capacities: to create whole flexible or rigid products such as rubber gloves, condoms and plastic caps; or to coat pre-manufactured products such as wire racks, wire cable and plastic coated handles.

Polyurethane is a material that is valued for its uses in “memory foam” products due to its flexibility and rigidity. Polyurethane is also a valuable material for products such as solid plastic forms, polyurethane rods, urethane wheels, urethane brushings, and urethane sheets. Urethane rolls is another common product with American Urethane being a leader. Polyurethane moldings have an excellent reputation for their high performance. Their longevity is greater than that of plastic, and are more impact-resistant than rubber. It also has elastic memory, reduces noise, and is resistant to heat and chemicals. It possesses many of the good qualities of metal, rubber, and plastics, and is capable of forming strong adhesive bonds with most plastics and metals.

Rotational plastic molding is capable of achieving plastic parts with more strength and structural complexity than any other plastic molding processes. Unlike other plastic molding methods, rotational molding produces a relatively low volume of parts in what are typically short runs, due to the amount of time and equipment required for rotational molding. Rotationally molded plastics may not be mass produced like blow molded, dip molded or thermoformed parts, and this process is typically reserved for complex or high-performance parts such as plastic figurines and military-spec rackmount carrying cases.

Vacuum formed plastics are used as faceplates and semi-flat components in a wide range of industries, particularly in electronic equipment such as fax machines, keyboards, phones and home appliances. Also known as thermoforming, or pressure forming, the vacuum forming process begins with stock plastic sheets rather than polymer resin pellets; these sheets are heated until the polymer reaches a flexible temperature, then they are vacuumed into an open mold, causing the heated sheets to “thermoform” to the exact shape of the die mold beneath. Twin sheet thermoforming is commonly used to create large and precision application parts such as hot tubs and interior wall panels for aerospace, but thermoforming is also a highly cost-effective means of producing three-dimensional plastic packaging. Blister packs, clamshells, plastic covers, plastic trays and other plastic packaging can be produced for low costs at high runs by vacuum forming.
Fiberglass Fabricators & Foam Fabricators

In the creation of fiberglass-reinforced plastic products, fiberglass molding is the most frequently used process. Fiberglass is made when molten glass is extruded through very fine openings in a tool. This extrusion process produces threadlike formations in the glass that are later put through heat treatment or pressing and mixed with plastic resin.
Foam fabricating is the manufacturing of a lightweight, versatile, polymer-based material. The material, such as plastic or polyurethane, is frothed up while in a molten state and then cooled, which fills the material with countless little bubbles, giving it an appearance similar to a sponge.
Foam fabricating is a broad term used to describe types of foam, applications and uses of those types and the products that can be formed from foam materials. Foam is simply a substance formed that consists of a number of air bubbles trapped in a liquid or a solid. Foam fabricators classify their product by two categories: open-cell foam and closed-cell foam. Closed-cell foam contains foam cells which are sealed, or “closed” and separate from one another.
Obviously, the plastic molding industry is a large segment of our economy and consumers and suppliers will be affected by the increases in cost from these tariffs.